
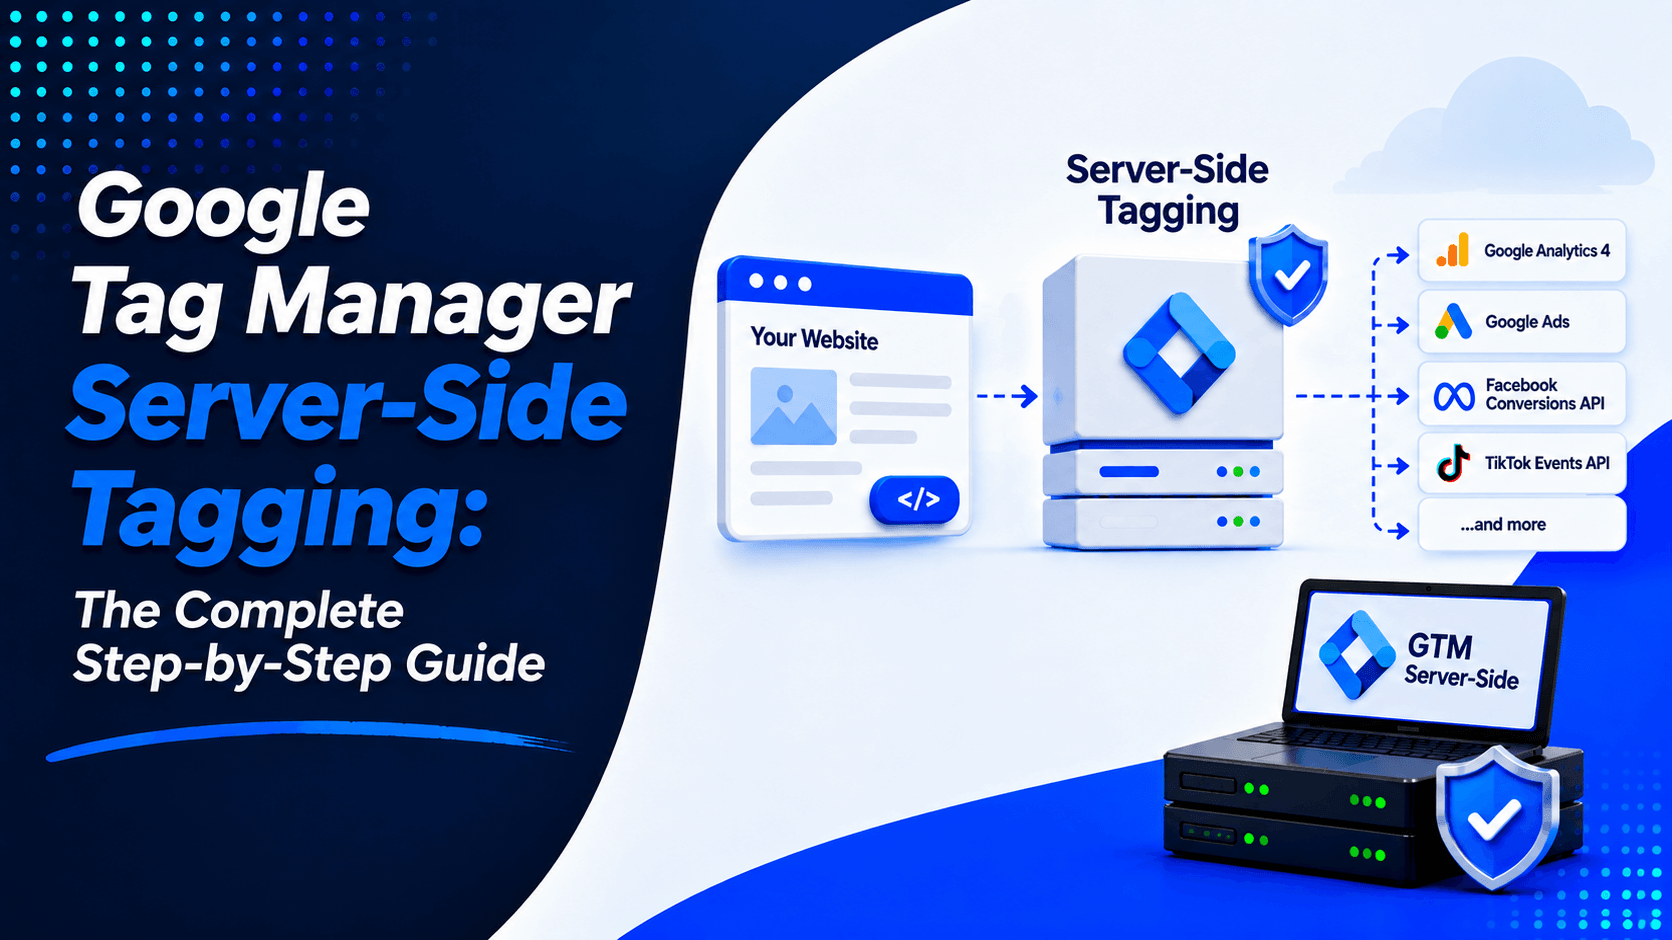
Google Tag Manager Server-Side Tagging sounds intimidating. In practice, it is one of the smartest upgrades you can make to an online store. Instead of your visitors’ browsers sending data straight to Google and Meta, data now travels to your own server first. Your server checks it, cleans it, and forwards it. You stay in control. Your ads get better data. And you stop losing conversions to ad blockers and browser privacy limits.
This guide walks you through the whole setup. You go from empty accounts to a working server container. That container feeds both GA4 and the Meta Conversions API. Every step is laid out in order. Follow Steps 01 to 09. You will have a complete, deduplicated tracking system running on Stape.io. Stape is the part that makes this easy.
What Is Server-Side Tagging?
With normal (client-side) tagging, a tag like the Facebook pixel or the GA4 tag runs in the visitor’s browser. The browser talks to Facebook and Google directly. That sounds fine, but it has problems:
- Ad blockers block those requests.
- Safari and Firefox delete the cookies those requests depend on.
- Every pixel makes the page slower.
- You never see exactly what data left your site.
Server-side tagging flips the model. The browser sends one request — mostly to your GA4 tag — to a server container that runs on your own domain (hosted by Stape.io). That server container then forwards the data to Google Analytics and to Meta’s Conversions API.
The browser only ever talks to your domain. Nothing else. That single change fixes most tracking loss.
What You Will Build
Here is the data flow you will end up with:
Website → Google Tag Manager (web container) → Stape server container → GA4 + Meta Conversions API
When you finish this guide you will have:
- GA4 events (page views and all ecommerce events) flowing through the server.
- Meta Conversions API events with matching event_id values. This means browser and server events deduplicate correctly.
- First-party cookies (
_fbp,_fbc) used safely on your own domain. - A setup you can test and verify in every tool involved.
Before You Start
You need a few things ready:
- A WordPress site with WooCommerce (this guide uses the GTM4WP plugin).
- Admin access to your WordPress dashboard.
- A Google account.
- A Meta Business Manager account with access to your ad account.
- A credit card free Stape.io account. Stape has a free plan with a monthly event limit, and paid plans start small.
Step 01: Create the Accounts
1. Create a Google Tag Manager account with a web container
Go to tagmanager.google.com and sign in with your Google account.
- Click Create Account.
- Enter an account name (usually your company name).
- Enter a container name, for example
My Store Web. - For Target platform, choose Web.
- Click Create and accept the terms.
You now have a web container with an ID that looks like GTM-XXXXXXX. Keep this screen open. You will use the ID in Step 02 and the tracking code is given to you right here.
2. Create a server container in the same GTM account
Server-side tagging needs a second container. This one has no website code at all. It runs on a server.
- In GTM, go to Admin.
- Under Container, click the + (plus icon) next to the container list.
- Name it, for example
My Store Server. - For Target platform, choose Server.
- Click Create.
The server container is empty for now. You will build tags inside it in Steps 04 to 09.
3. Create a Google Analytics 4 property
- Go to analytics.google.com and sign in.
- Click Admin (the gear icon in the bottom left).
- Click Create Property and name it, for example
My Store. - Choose your reporting time zone and currency, then click Next.
- Answer the business prompts and click Create.
GA4 automatically creates a data stream for you. Open that stream and copy the Measurement ID — it looks like G-XXXXXXXX. You will need it in Step 03 and Step 09.
4. Create your Stape.io server account and container
- Go to stape.io and create an account (or log in).
- On the main page, click Create sGTM container.
- Enter a container name.
- Click Create Container.
Stape now gives you a subdomain, for example gtm.yourdomain.com. To use it, you add a CNAME record in your domain’s DNS settings that points that subdomain at Stape. Stape shows you the exact record to create, and each provider lists the steps in their help center.
Use a same-origin subdomain (like gtm.yoursite.com rather than a totally separate domain). Same-origin subdomains share cookies with your main site, which is exactly what you want for _fbp and _fbc.
5. Create your Meta dataset (pixel)
The Meta pixel now lives inside something called a dataset. Your existing pixel ID and the new dataset ID are the same number, but you create datasets from Events Manager.
- Go to Meta Events Manager (business.facebook.com/events_manager).
- Click Connect data sources and choose Web.
- Choose Meta Pixel (this creates a dataset) and click Continue.
- Give the pixel a name, like
My Store Pixel, then click Create Pixel.
Save the Pixel ID — it is an 8 to 16 digit number. You will also need an Access Token from this dataset later (Step 09), so keep this tab open or bookmark it.
Step 02: Connect the Website
5. Install the GTM4WP plugin (WordPress only)
- In WordPress, go to Plugins → Add New.
-
Search for Google Tag Manager for WordPress.(by Thomas Geiger — the plugin slug is
duracelltomi-google-tag-manager). - Click Install Now, then Activate.
6. Connect the GTM container ID
- In WordPress, go to Settings → Google Tag Manager.
- Paste your web container ID (
GTM-XXXXXXX) into the Google Tag Manager ID field. - Save the changes.
GTM4WP now places the GTM snippet on every page for you. You do not need to touch your theme files.
7. Turn on the data layer
The same GTM4WP settings page controls the data layer. Enable these:
- Add product data to dataLayer (this pushes product info for ecommerce events).
- WooCommerce integration (this activates
view_item,add_to_cart,begin_checkout, andpurchaseevents). - Use container code with data layer or equivalent, so GTM4WP pushes data into the data layer.
Save, then open GTM Preview mode on your site (see the verification section later) to confirm you see data layer events firing as you browse products.
Not on WordPress? Install the two GTM snippets (from Step 01) directly in your page head and body instead, and push the same ecommerce data layer events manually with dataLayer.push(...). The rest of this guide works the same way.
Step 03: Create the Shared Variables
Variables are the building blocks of every tag. Create these once in the web container — Steps 04 to 08 reuse them constantly.
| # | Variable name | Type | Value / purpose |
|---|---|---|---|
| 8 | Pixel ID |
Constant | The Meta dataset (pixel) ID number |
| 9 | Measurement ID |
Constant | Your GA4 stream ID, G-XXXXXXXX |
| 10 | Event ID Variable |
Custom JavaScript | A unique ID per event, for deduplication |
| 11 | Server Container URL |
Constant | https://gtm.yourdomain.com (from Stape) |
| 12 | Cookie - _fbp |
First-Party Cookie | Reads the _fbp cookie |
| 13 | Cookie - _fbc |
First-Party Cookie | Reads the _fbc cookie |
| 14 | dlv-ecommerce items |
Data Layer | ecommerce.items (the items array) |
| 15 | Timestamp seconds |
Custom JavaScript | Current time in Unix seconds |
The Event ID Variable creates a fresh ID every time an event fires:
function() {
  return 'ev_' + Date.now() + '_' + Math.floor(Math.random() * 100000);
}
The browser creates this ID once, and the same value is forwarded to the server. That is what lets Facebook match your browser event to your server event. One line in this code appears twice — that is fine if your own copy uses a slightly different random suffix.
The Timestamp seconds variable:
function() {
  return Math.round(new Date().getTime() / 1000);
}
Facebook wants event_time in Unix seconds, and this gives it exactly that.
One naming note: this guide uses the modern GA4 data layer format, where products live at ecommerce.items. Older plugins sometimes use a legacy format (ecommerce.detail.products) from Universal Analytics days. If you see ecommerce.detail.products in your data layer, update your plugin, or map every path below to that older structure. The modern ecommerce.items format is what GA4 expects.
Step 04: PageView
Page views are the foundation. Every other event depends on this tag.
In the web container: GA4 Configuration tag
This is the most important tag in the whole setup. It decides where all data goes.
| Field | Value |
|---|---|
| Tag type | Google Analytics: GA4 Configuration |
| Measurement ID | {{Measurement ID}} |
| Send to server container | On (toggle) |
| server_container_url | {{Server Container URL}} |
| send_page_view | true |
| first_party_collection | true |
| Trigger | All Pages |
Two fields here do the heavy lifting:
server_container_urlroutes every GA4 request to your Stape container instead of straight to Google.first_party_collection = truelets the tag pass visitor details (email, phone, address) to the server when they are available. Without it, you get no user data server-side.
In the server container: Facebook tag — PageView
| Field | Source |
|---|---|
| event_name | PageView |
| event_id | event_id |
| event_time | {{Timestamp seconds}} |
| x-fb-ck-fbp | _fbp |
| x-fb-ck-fbc | _fbc |
The _fbp and _fbc values travel from the web container as event parameters (from your First-Party Cookie variables). The server tag hands them to Facebook, which uses them to match visitors.
In the server container: GA4 tag — page_view
| Field | Source |
|---|---|
| event_name | page_view |
| Trigger | All Events (or page_view) |
That is the whole GA4 page view tag. The GA4 client in the server container forwards all incoming parameters by itself — you never remap value, currency, or items for GA4. Cleaner tags, less to maintain.
Step 05: ViewContent
This event fires when a visitor looks at a product page. It feeds Meta’s product-aware optimization and your GA4 engagement data.
In the web container
Create a GA4 Event tag with:
- Event name:
view_item - Trigger:
view_item(from GTM4WP) - Custom parameter
event_id={{Event ID Variable}} - Custom parameters
_fbp={{Cookie - _fbp}},_fbc={{Cookie - _fbc}}
In the server container: Facebook tag — ViewContent
| Field | Source |
|---|---|
| event_name | ViewContent |
| content_type | product |
| content_name | ecommerce.items.0.item_name |
| content_ids | ecommerce.items.0.item_id |
| x-fb-cd-content_category | ecommerce.items.0.category |
| value | ecommerce.value |
| currency | ecommerce.currency |
| event_id | event_id |
| x-fb-ck-fbp | _fbp |
| x-fb-ck-fbc | _fbc |
In the server container: GA4 tag — view_item
| Field | Source |
|---|---|
| event_name | view_item |
| Trigger | All Events (or view_item) |
The product data you see above comes from GTM4WP’s data layer on the product page. ecommerce.items holds one item for a product view, and the paths above pull the name, ID, and category out of it.
Step 06: AddToCart
Someone just added a product to the cart. This event matters for both conversion optimization and retargeting.
In the web container
A GA4 Event tag with:
- Event name:
add_to_cart - Trigger:
add_to_cart(from GTM4WP) - Custom parameter
event_id={{Event ID Variable}} - Custom parameters
_fbp,_fbcfrom the cookie variables
In the server container: Facebook tag — AddToCart
| Field | Source |
|---|---|
| event_name | AddToCart |
| content_type | product |
| content_name | ecommerce.items.0.item_name |
| content_ids | ecommerce.items.0.item_id |
| x-fb-cd-content_category | ecommerce.items.0.category |
| value | ecommerce.value |
| currency | ecommerce.currency |
| event_id | event_id |
| x-fb-ck-fbp | _fbp |
| x-fb-ck-fbc | _fbc |
In the server container: GA4 tag — add_to_cart
| Field | Source |
|---|---|
| event_name | add_to_cart |
| Trigger | All Events (or add_to_cart) |
Step 07: InitiateCheckout
The visitor reached the checkout. This is one of Meta’s strongest signals, so make sure the data is complete — including total quantity.
In the web container
A GA4 Event tag with:
- Event name:
begin_checkout - Trigger:
begin_checkout(from GTM4WP) - Custom parameter
event_id={{Event ID Variable}} - Custom parameters
_fbp,_fbcfrom the cookie variables
Note the event name: GA4 calls this event begin_checkout. InitiateCheckout is the Facebook name. Both are correct in their own system — just do not cross them over.
In the server container: Facebook tag — InitiateCheckout
First create a quantity variable that sums the items in the cart. It uses the dlv-ecommerce items data layer variable you built in Step 03:
function() {
  var items = {{dlv-ecommerce items}};
  if (!items || !Array.isArray(items) || items.length === 0) {
    return 1;
  }
  return items.reduce(function(total, item) {
    var qty = item.quantity ? Number(item.quantity) : 1;
    return total + qty;
  }, 0);
}
Then build the tag:
| Field | Source |
|---|---|
| event_name | InitiateCheckout |
| content_type | product |
| content_name | ecommerce.items.0.item_name |
| content_ids | ecommerce.items.0.item_id |
| x-fb-cd-content_category | ecommerce.items.0.category |
| value | ecommerce.value |
| currency | ecommerce.currencyCode |
| quantity | {{Quantity - Checkout}} (the variable above) |
| event_id | event_id |
| x-fb-ck-fbp | _fbp |
| x-fb-ck-fbc | _fbc |
In the server container: GA4 tag — begin_checkout
| Field | Source |
|---|---|
| event_name | begin_checkout |
| Trigger | All Events (or begin_checkout) |
Step 08: Purchase
This is the event that pays for the whole setup. Purchase data must be complete: order ID, items, and customer details.
In the web container
A GA4 Event tag with:
- Event name:
purchase - Trigger:
purchase(from GTM4WP) - Custom parameter
event_id={{Event ID Variable}} - Custom parameters
_fbp,_fbcfrom the cookie variables
The customer details reach the server automatically because first_party_collection = true is set on the Configuration tag from Step 04. The GA4 client exposes them as user_data.* parameters.
In the server container: Facebook tag — Purchase
Create a contents variable first. Facebook wants a clean list of products with quantities and prices:
function() {
  var getDataFromArray = {{dlv-ecommerce items}};
  return getDataFromArray.map(function(item) {
    return {
      id: item.item_id,
      quantity: item.quantity,
      item_price: item.price
    };
  });
}
Then build the tag:
| Field | Source |
|---|---|
| event_name | Purchase |
| content_type | product |
| content_name | ecommerce.items.0.item_name |
| content_ids | ecommerce.items.0.item_id |
| x-fb-cd-content_category | ecommerce.items.0.category |
| value | ecommerce.value |
| currency | ecommerce.currency |
| contents | {{Contents - Purchase}} (the variable above) |
| order_id | ecommerce.transaction_id |
| user_data.email_address | user_data.email_address |
| user_data.phone_number | user_data.phone_number |
| user_data.first_name | user_data.first_name |
| user_data.last_name | user_data.last_name |
| user_data.country | user_data.country |
| user_data.city | user_data.city |
| user_data.postal_code | user_data.postal_code |
| user_data.coupon | ecommerce.coupon |
| event_id | event_id |
| x-fb-ck-fbp | _fbp |
| x-fb-ck-fbc | _fbc |
Two small corrections to common mistakes: the price path is ecommerce.items.0.price (one dot between items and 0), and value for a purchase is the order total, which GTM4WP stores in ecommerce.value.
In the server container: GA4 tag — purchase
| Field | Source |
|---|---|
| event_name | purchase |
| Trigger | All Events (or purchase) |
GA4 receives the full items array and transaction_id through the GA4 client automatically.
Step 09: Create the Server Container Tags
Steps 04 to 08 assumed the server tags already exist. Now create them. You only build each tag type once — then you make copies for each event.
11. Create the GA4 API tag in the server container
- Open your server container in GTM.
- Click Tags → New.
- Choose tag type Google Analytics: GA4.
- Measurement ID:
{{Measurement ID}}(theG-XXXXXXXXfrom Step 01). - Leave Event Name empty if the event name comes through as-is; otherwise set it per event copy (e.g.,
page_view,purchase). - Trigger: All Events (or pick a specific GA4 event per copy).
- Save.
The GA4 client in the server container already parses your web requests into events. The GA4 tag simply forwards them to your property.
12. Create the Facebook Conversions API tag in the server container
- Click Tags → New.
- Add the tag from the template gallery: search for Facebook Conversions API (by Meta) and add it to your workspace.
- Facebook Pixel ID:
{{Pixel ID}}(the dataset ID). - Access Token: paste the token from Events Manager (dataset → Settings → Conversions API → Generate access token).
- Action source:
website. - Event Name: set per copy (
PageView,ViewContent,AddToCart,InitiateCheckout,Purchase). - Fill in Event ID and the Event Data fields using the mapping tables from Steps 04 to 08.
- Trigger: All Events (or the matching GA4 event per copy).
- Save.
Make one copy of this tag per event, with that event’s name and field mapping. Give each copy a clear name, like FB CAPI - Purchase. Duplicate tags are normal here — each one is small and focused.
Publish and connect the web side
- In the web container, click Submit to publish your container.
- In the server container, click Submit to publish too.
- In Stape, open your container’s Live events view and load your website. You should see requests arriving.
How Event Deduplication Works
If you run both a Meta pixel and the Conversions API, Facebook may receive the same purchase twice — once from the browser pixel, once from your server. Duplicates inflate your numbers and confuse the ad optimizer.
Facebook solves this with three matching values, and you already set all of them:
- event_id: the unique ID your variable creates per event. Same value in browser and server.
- event_time: the exact second the event happened (your Timestamp seconds variable).
- _fbp / _fbc: the browser and click cookies.
When Facebook sees the same event_id with the same time and cookies from both channels, it merges them into one event. No double counting. That is why the event_id variable appears in every single tag table above. Do not skip it.
How to Test and Verify Everything
Never trust a setup you have not watched fire. Check all five places:
1. GTM Preview (web container) Open Preview mode, click your site, and confirm every GA4 tag fires on the right pages. Check that event_id, _fbp, and _fbc parameters exist on each event.
2. GTM Preview (server container) Publish the server container with Preview enabled, then go to Preview in the server container. Load your site and watch requests arrive, get parsed by the GA4 client, and trigger your server tags.
3. GA4 DebugView Open GA4 → Admin → DebugView, load your site with Preview mode on, and watch page_view, view_item, add_to_cart, begin_checkout, and purchase appear in real time.
4. Meta Events Manager → Test Events Open your dataset, click Test events, load your site, and trigger each event. Every event should appear with “Deduplicated” or “Merged” status showing that browser and server copies matched.
5. Stape Live events Stape shows every request entering your server container. Filter by tag name and confirm each Facebook and GA4 call fired with the expected parameters.
Common Problems and Fixes
| Problem | Likely cause | Fix |
|---|---|---|
| No requests in server Preview | server_container_url wrong or DNS not ready |
Check the URL in the GA4 Configuration tag; confirm the CNAME record resolves |
| Events fire twice in Meta | Missing event_id or wrong mapping |
Verify event_id is on every web tag and mapped in every FB server tag |
| No user data on Purchase | first_party_collection not set to true |
Add first_party_collection: true to the GA4 Configuration tag and republish |
_fbp / _fbc empty |
Cookie variable path wrong | Confirm the First-Party Cookie variables match the actual cookie names |
| ViewContent data empty | Old data layer format | Check for ecommerce.detail.products and update the plugin or mapping |
| Visitors reject tracking | Consent banner blocking data | Enable consent mode and configure GTM4WP’s consent integration so data flows after opt-in |
| Server URL blocked by cookie banner | Subdomain not same-origin | Use gtm.yourdomain.com (same domain), not a third-party domain |
FAQ
Do I still need the Meta pixel if I have the Conversions API? Yes. The pixel captures browser-side events and handles things like click attribution and retargeting. The server-side CAPI strengthens it. Run both with matching event_id values, and Facebook merges them.
How much does server-side tagging cost? Stape has a free plan with a monthly event limit, which suits small stores. Paid plans start small and scale with your traffic. The exact limits change, so check Stape’s pricing page for current numbers.
Will this slow down my site? Usually the opposite. The browser sends fewer requests, and the heavy work happens on your server. Pages often get faster once all the extra pixels are moved server-side.
Is GA4 affected? No. GA4 receives the same events, but now they arrive through your server. In fact, GA4 data gets more accurate because fewer requests are blocked.
What if I use another ecommerce platform? The concepts are identical. Skip the GTM4WP parts, add the GTM snippets manually, and push the same ecommerce.items data layer events. Every tag mapping in Steps 04 to 08 still applies.
Final Words
Google Tag Manager Server-Side Tagging is one of those technical upgrades that quietly improves everything: cleaner analytics, better ad performance, faster pages, and full visibility into your own data. The setup takes a couple of hours, but every step in this guide is repeatable and testable. Build it once, verify all five checkpoints, and your tracking will keep working even when browsers keep tightening their privacy rules.
Start with Step 01 and work down the list. When you hit a snag, the troubleshooting table above covers the nine most common issues. And remember the golden rule of this entire setup: if event_id is missing from any tag, deduplication breaks — so check that value first, always.

Leave a Comment