Ease of Use
I tested how easy Hostinger is to use. I looked at the signup process. I checked the dashboard and control panel. I also tried managing a server. My goal was to see if beginners could figure things out. The platform felt very intuitive throughout.
1. Registration
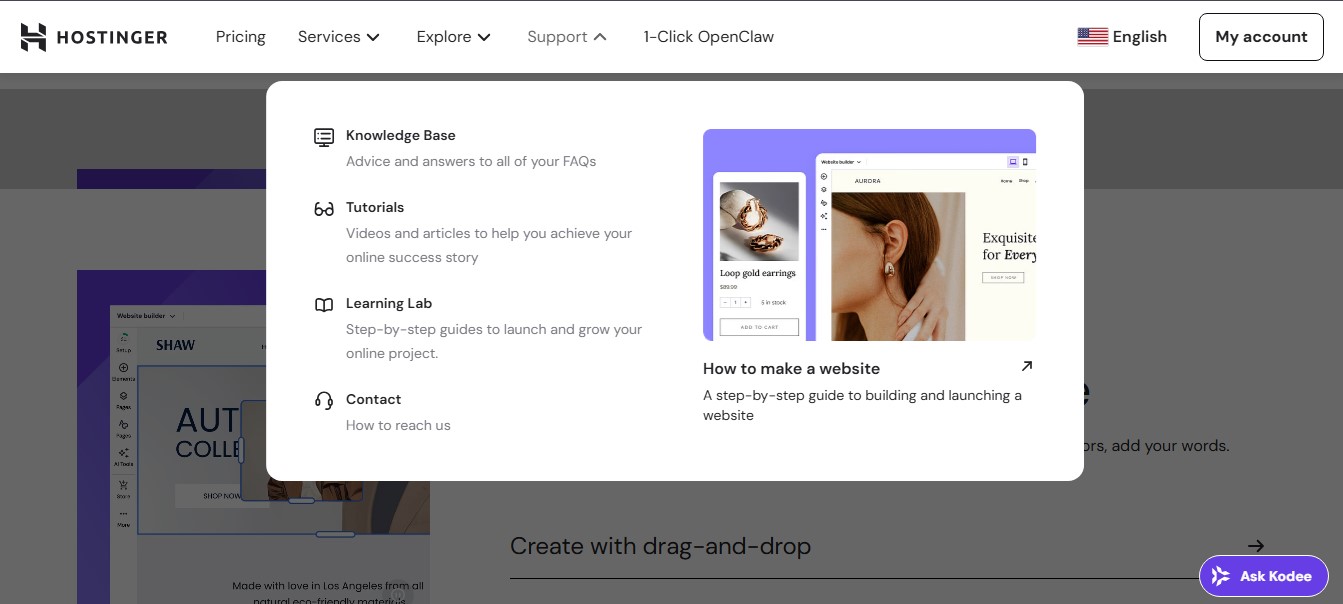
Here is how I signed up for Hostinger. First, I went to the Hostinger homepage. Second, I clicked Services at the top menu. Third, I looked under the Hosting section. Fourth, I picked the type of hosting I needed. Fifth, I chose VPS hosting for my test. The whole process felt easy and natural.
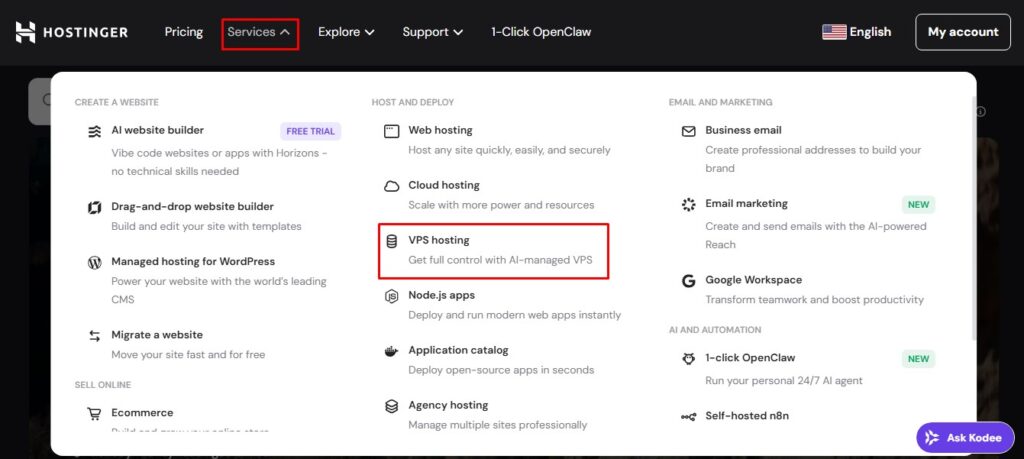
2. Choose a Plan
I landed on the VPS hosting page. Then I clicked Start Now. That showed me a list of available plans. I looked through each option. Then I picked the KVM 2 plan. Finally, I clicked Choose plan.
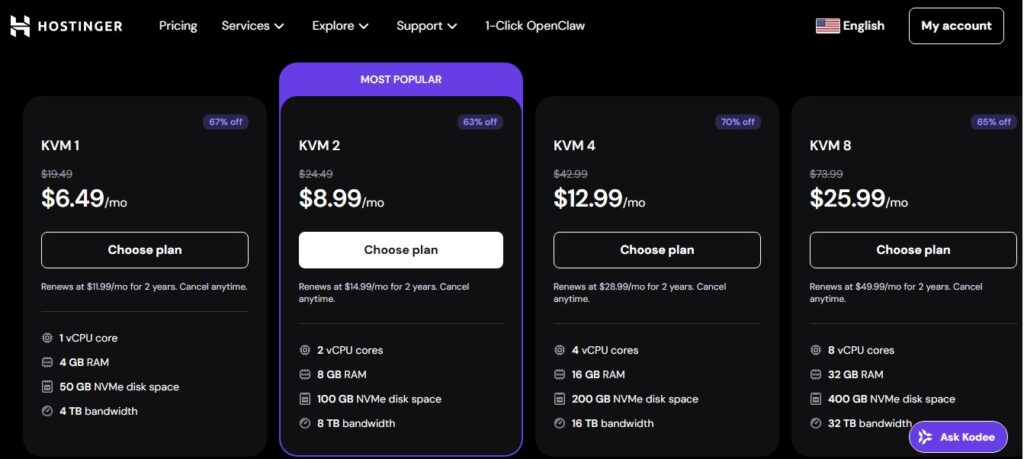
3. Review Your Cart
A summary page appeared. It was called Your Cart. I checked the plan I had chosen. Then I picked my preferred payment period. After that, I clicked Continue. Do you have a coupon code? You can enter it on this page too.
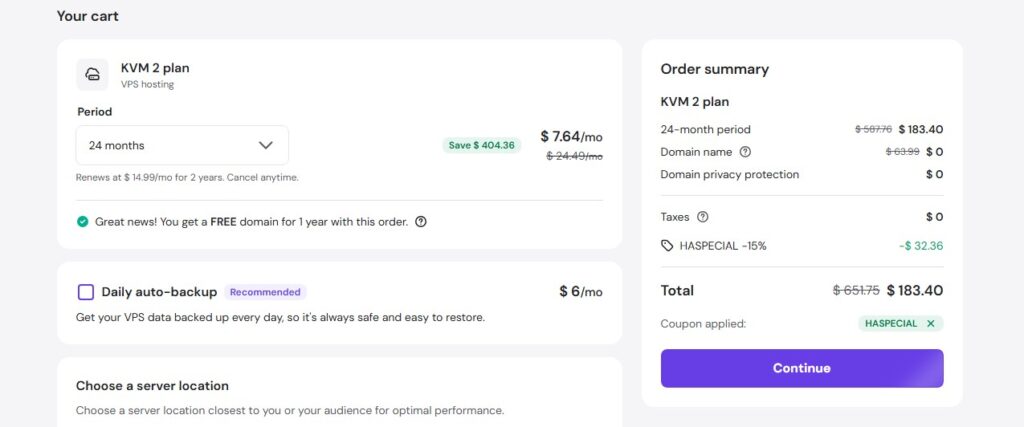
4. Create Your Account
I clicked Continue again. That sent me to the account creation page. Hostinger gives you two simple options. You can create an account from scratch. Or you can log in with Google or Facebook. I chose to make a new account. Then I entered my payment details.
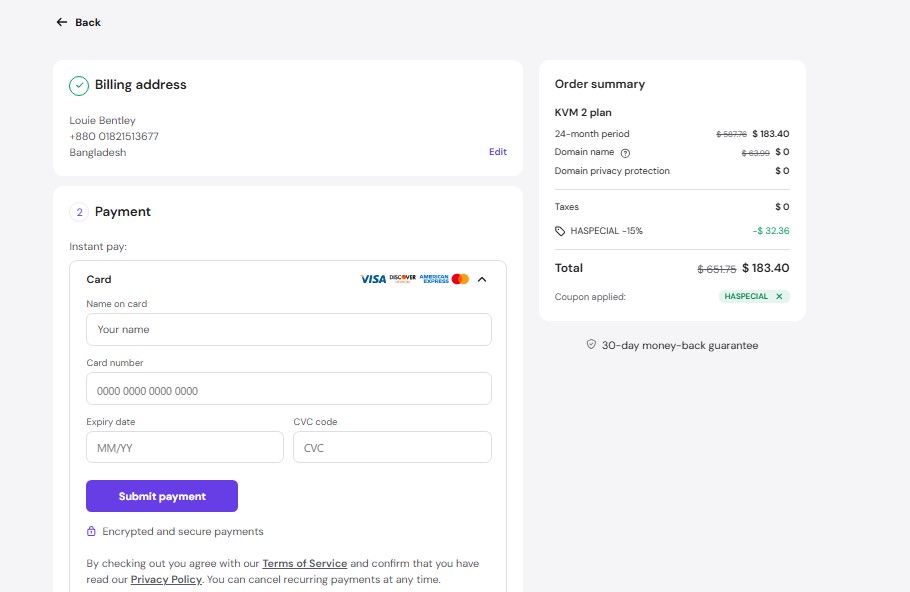
5. Payment & Access
Hostinger takes many forms of payment. You can use credit cards. You can use e-wallets like PayPal too. The checkout feels smooth.
I paid for my plan. Right after that, I got into my VPS. An email arrived as well. It confirmed my account and VPS were all set up.
Dashboard
After I signed up, the dashboard loaded. It felt simple and clear. Everything I needed was right there. The dashboard lets you manage your hosting and account settings without any hassle.
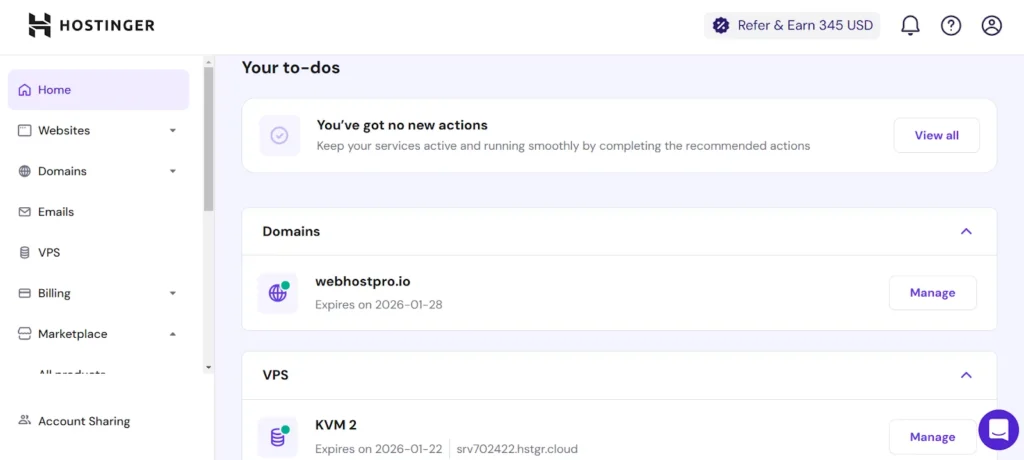
Left Panel Breakdown
Most of your work happens in the left panel. It is split into a few simple sections.
Home – See an overview of your account. Quick links to key features live here.
Websites – Add or manage your sites. You will find tools for files and SSL too.
Migrations – Move websites from other hosts to Hostinger. The process is easy.
Domains – Manage your domains. Add new ones or transfer existing ones. You can also update DNS settings.
Marketplace – Find extra tools and services. This includes website builders, premium themes, and helpful apps.
Server Management with hPanel
I clicked Manage next to my VPS plan. That took me to hPanel. This is Hostinger’s own control panel. It is built for beginners. The design is simple. Even new users feel comfortable here.
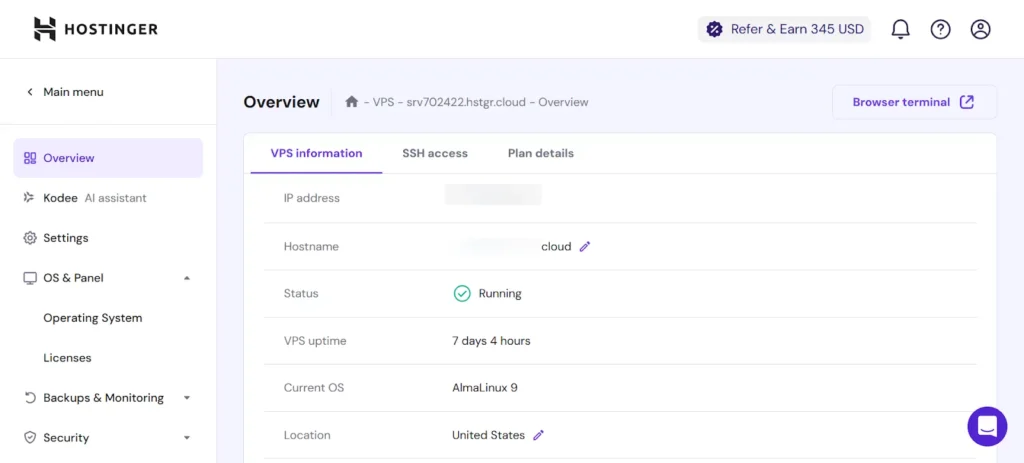
hPanel Configuration Page
I clicked into my VPS settings. The hPanel loaded right away. The layout felt clean and easy on the eyes. Nothing was crowded. All the important VPS details were right there. Here is what I found on the configuration page.
- Overview – See your VPS status and uptime at a glance.
- OS & Panel – Check your operating system and license info.
- Security – Lock down your VPS with security tools.
- Settings – Tweak your server setup here.
- Kodee – Hostinger’s AI helper. Ask it anything.
- Backups & Monitoring – Manage backups and keep an eye on server health.
- DNS Manager – Point domains to your server with ease.
- Tutorials – Step-by-step guides for common tasks.
Snapshots & Backups in hPanel
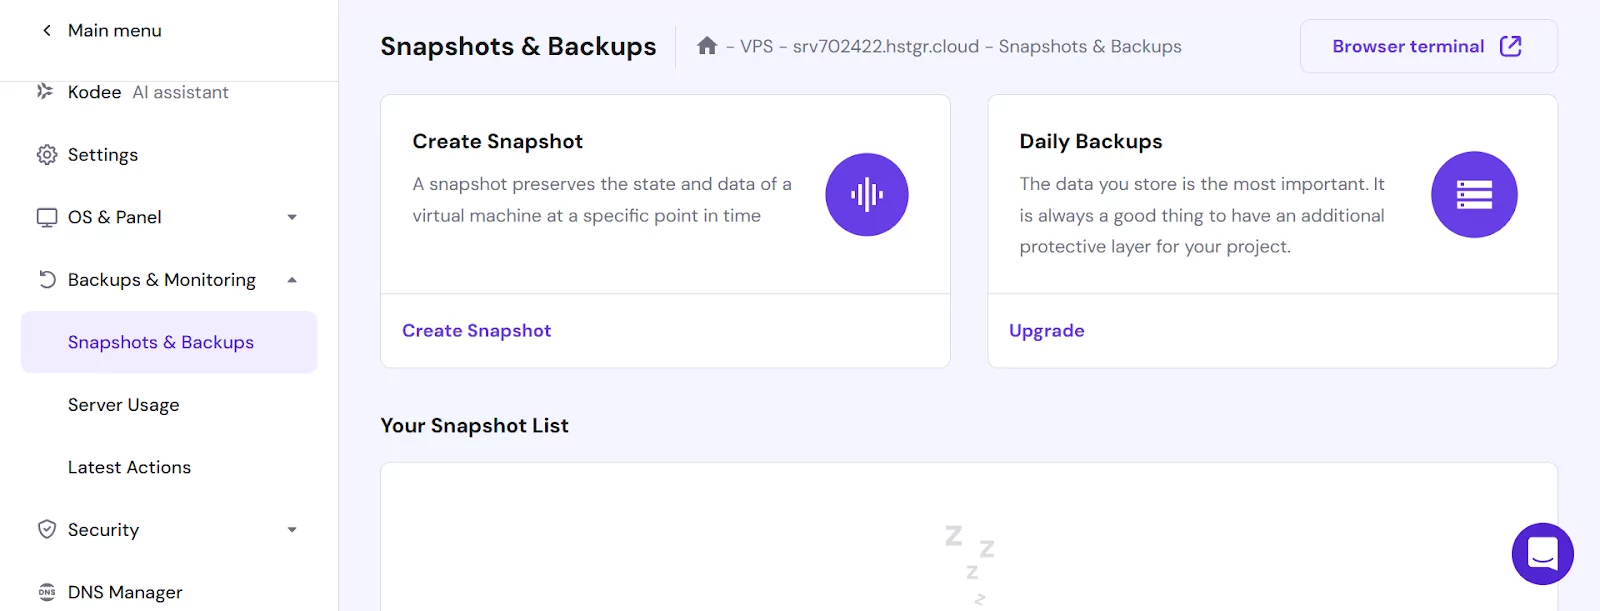
While digging through hPanel, I found the Snapshots & Backups section. This is where you keep your server data safe. Let me break down the difference between the two.
A snapshot is a quick picture of your server right now. You take it manually before big changes. Only one snapshot exists at a time. Make a new one and the old one is gone. Snapshots disappear after 20 days. Change your operating system? Your snapshot vanishes too .
A backup runs on a schedule. You set it and forget it. Weekly backups come free with all VPS plans. Daily backups cost extra. Your server locks during restoration. Two backups stay available at a time. New ones replace the oldest .
Use snapshots before risky updates or experiments. Use backups for ongoing daily protection. Snapshots restore faster but hold less history. Backups give you regular safety without manual work.
Server Usage in hPanel
I found the Server Usage section while poking around hPanel. This tool watches your VPS in real time. It shows you how your server is performing. The data appears in simple graphs that are easy to read.
Here are the key metrics I could track:
CPU Usage – This tells you how much processing power your server is using. A little spike now and then is normal. Installing big apps or handling lots of data can push it up . But if it stays high all the time, you might have a problem.
RAM Usage – This shows how much memory your server processes are eating up. Watch this one closely. If it is always near the top, your server needs more resources to run smoothly.
Disk Usage – This keeps an eye on your storage space. Running out of room will slow things down fast. You can set a disk quota to limit how much space your files take up.
Number of Processes – This counts every process running on your server. Keep this number low. Too many processes can choke your performance.
Disk Inodes – These are your files and folders. Every file counts as one inode. Log files build up fast and eat your inodes. Clean them out regularly.
Incoming & Outgoing Traffic – These show data moving in and out of your server. Good for spotting traffic spikes or unusual activity.
If you notice any issues on these graphs, you can fix them fast. The sooner you spot a problem, the less damage it does to your site.
Final Thoughts on Ease of Use
After testing Hostinger from start to finish, I walked away impressed. The platform is built for regular people, not just tech experts. Signing up took minutes. The dashboard made sense right away. hPanel was cleaner than cPanel. Every tool I needed was easy to find. Even setting up a WordPress site felt smooth. I did not need a single tutorial. For beginners, this matters a lot. You want to focus on your website, not fight your hosting control panel. Hostinger gets that. They removed the clutter. They kept what works. The learning curve is almost flat. If you have ever used a phone app, you can use Hostinger. That is the real test of ease of use.
Performance
I tested Hostinger’s Web Hosting and VPS plans. I wanted to see how they handle real-world workloads. First, I will share my web hosting results. Then I will move on to the VPS numbers.
1. Web Hosting Performance Test
I built a real WordPress site for this test. It had images, videos, and written content. I even installed a few plugins. Nothing fancy. Just a normal website like most people run .
Once the site was ready, I ran speed tests using GTMetrix. Why GTMetrix? It gives a full picture of load times and interactivity. It also shows where you can improve .
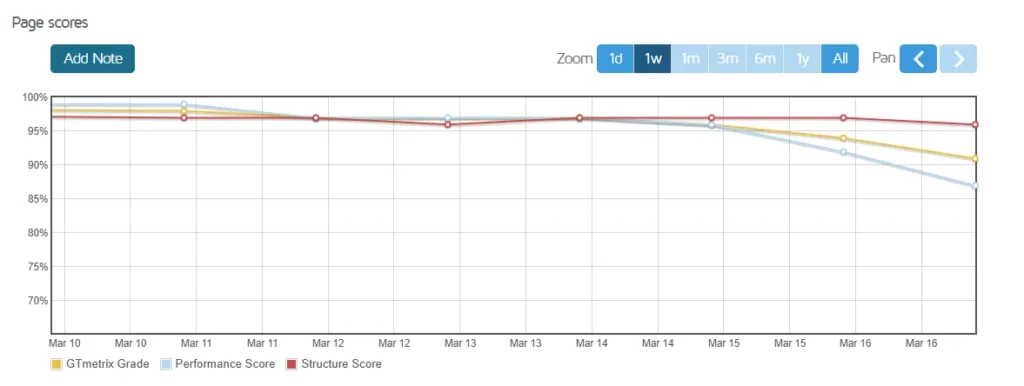
Here is what the latest performance report showed for my test site.
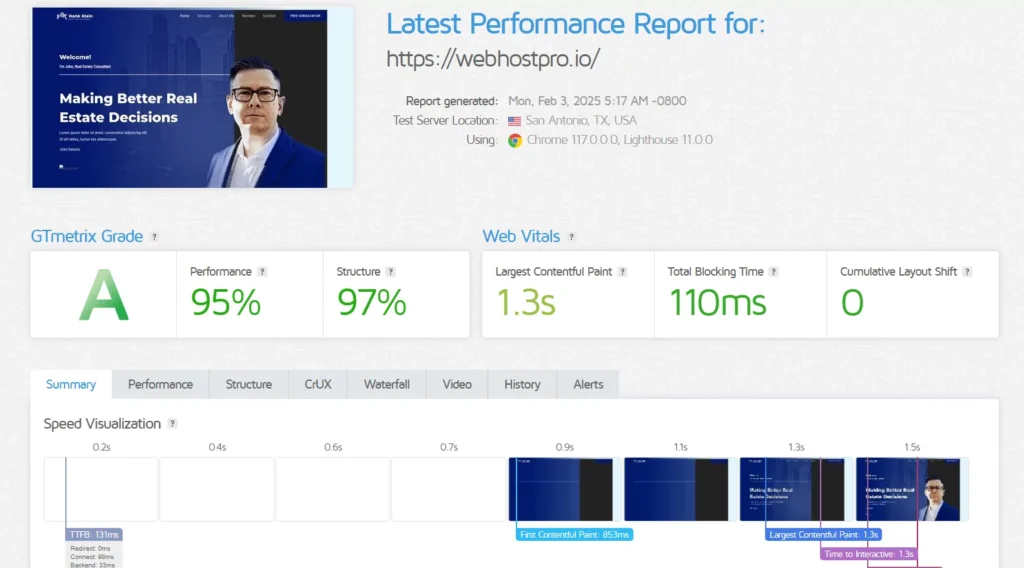
GTMetrix Results
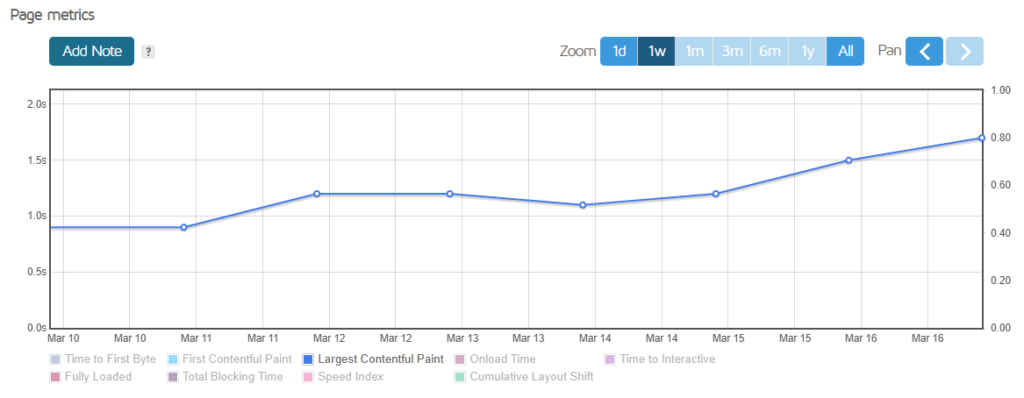
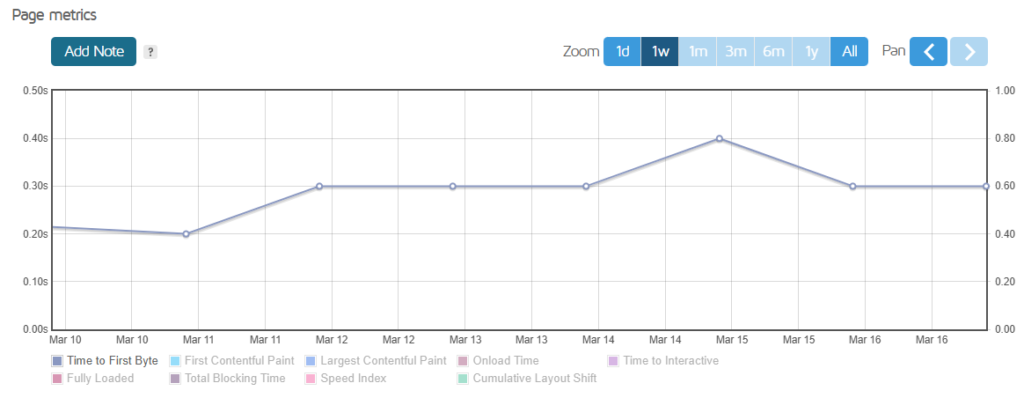
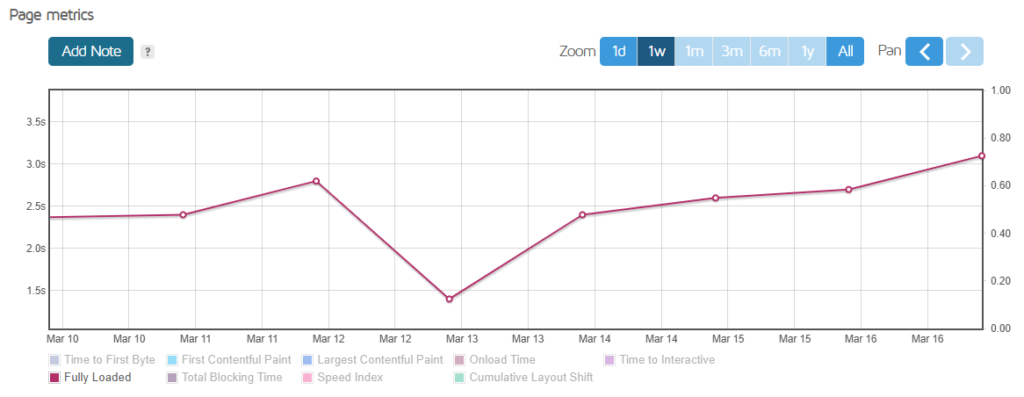
I ran my test site through GTMetrix. The numbers came back strong. Here is what the tool reported.
Key Performance Metrics